Introduction
Solar panels are a fantastic investment for generating clean energy and reducing your electricity costs. They not only contribute to a greener planet but also provide long-term financial benefits. However, like any technology, solar panels are not without challenges. From performance dips to environmental impacts, issues can arise that may hinder their efficiency or longevity.
Understanding the most common solar panel problems and how to address them is vital to maximizing your investment. By staying informed and proactive, you can keep your system operating at its best while avoiding unnecessary expenses. In this guide, we’ll walk you through the frequent challenges faced by solar panel owners and offer practical solutions to keep your solar energy system running smoothly for years to come.
1. Shading Issues
Problem: Shading and Reduced Energy Output
Even partial shading—caused by trees, nearby buildings, debris, or other obstructions—can have a substantial impact on the performance of your solar panels. This issue arises because most solar panels are interconnected in a series. If one panel is shaded, it can act as a bottleneck, reducing the energy production of the entire system. Left unchecked, shading can undermine your system’s efficiency and diminish the return on your investment.
Solution: Maximizing Sunlight Exposure
- Prune Nearby Trees Regularly
Overgrown branches can cast shadows on your panels, especially during critical sunlight hours. Regularly trimming trees around your property ensures that your solar panels receive unobstructed sunlight. - Remove Debris or Potential Obstructions
Leaves, dirt, and other debris can also create shading effects, particularly after storms or seasonal changes. Cleaning your panels as part of routine maintenance will help maintain optimal energy output. - Install Micro-Inverters or Power Optimizers
Unlike traditional string inverters, micro-inverters and power optimizers allow each panel to operate independently. This technology minimizes the impact of shading on the overall system, ensuring that unshaded panels continue producing energy efficiently. - Strategic Placement of Panels
Work with your installer to position panels in areas with maximum sunlight exposure. Avoid placing them near obstructions like chimneys, satellite dishes, or taller structures that may cast shadows during peak sunlight hours.
2. Dirt and Debris Accumulation
Solution: Keeping Panels Clean
- Regular Cleaning Schedule
Clean your solar panels at least twice a year to maintain optimal performance. Use soft brushes, microfiber cloths, or sponges with non-abrasive cleaners to avoid scratching the surface. Cleaning after seasons of heavy pollen, dust, or bird activity is particularly important. - Invest in Self-Cleaning Panels or Automated Systems
For large-scale installations or hard-to-reach panels, self-cleaning panels or automated cleaning systems can be a worthwhile investment. These solutions ensure your panels remain clean with minimal effort, reducing the need for manual maintenance. - Monitor Energy Production
Use a solar monitoring system to track energy output. A sudden dip in production could indicate that soiling is affecting your panels. Prompt cleaning can restore efficiency before the issue escalates. - Preventative Measures
If bird droppings are a recurring issue, consider installing bird deterrents, such as anti-roosting spikes or mesh barriers, around your panels. In areas prone to heavy dust, installing panels at an optimal tilt can help dust slide off naturally.
By maintaining clean panels, you can ensure maximum sunlight absorption and sustain high energy efficiency throughout the lifespan of your solar system.
3. Poor Installation Practices
Problem: Improper Installation
Poor installation practices can jeopardize the efficiency and safety of your solar panel system. Structural issues such as misaligned panels or unstable mounting can lead to damage over time, while electrical faults may cause performance inefficiencies or even hazards. Many of these problems arise when unqualified or inexperienced installers fail to follow best practices or overlook critical details.
Solution: Ensuring Proper Installation
- Hire Certified Professionals
Always work with certified solar installation professionals who have a proven track record in the field. Look for accreditations from reputable organizations, such as NABCEP (North American Board of Certified Energy Practitioners) or similar certifications in your region. Experienced professionals understand the technical requirements and can optimize the setup for maximum efficiency. - Adhere to Local Regulations and Manufacturer Guidelines
Ensure the installation complies with local building codes, electrical standards, and the manufacturer’s specifications. Proper adherence not only guarantees safety but also protects your system warranty. - Request a Post-Installation Inspection
After the installation is complete, request a thorough inspection from a third-party expert or a representative from your solar provider. They can verify that the system is installed correctly, aligned with safety standards, and optimized for energy production. - Ask About Structural Considerations
Before installation, confirm that your roof or mounting surface can support the weight of the panels and mounting equipment. Certified installers should conduct an assessment to address these concerns and suggest necessary reinforcements if needed. - Understand Your System
A reliable installer will walk you through the setup, explaining how the system works and providing maintenance tips. This knowledge empowers you to detect potential issues early.
By prioritizing professional installation and thorough inspections, you can avoid costly mistakes and ensure that your solar system operates efficiently and reliably for years to come.
4. Faulty Wiring or Connections
The Problem:
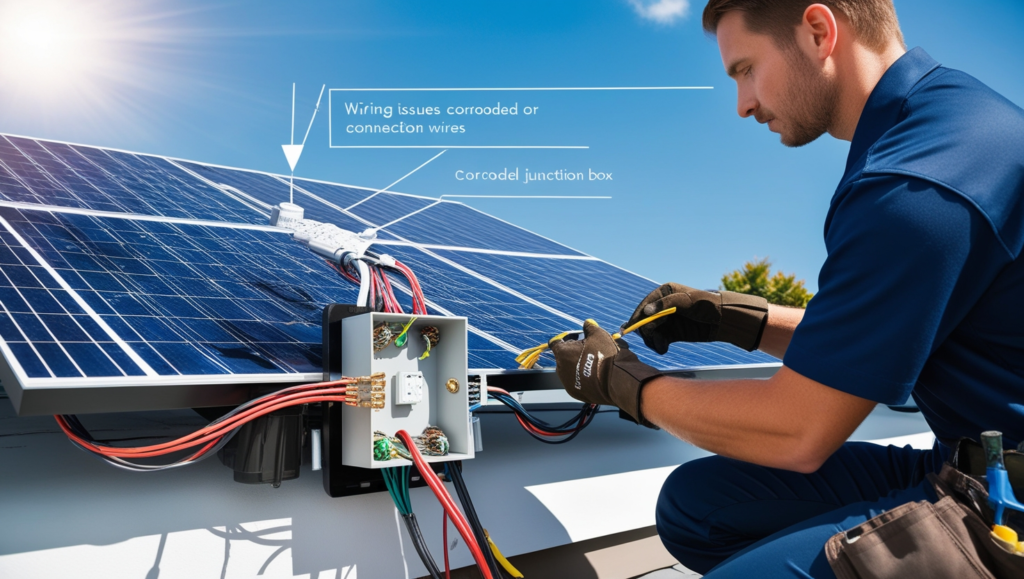
Wiring and electrical connections are integral to the functioning of a solar power system. However, loose, worn, or corroded connections can lead to a variety of problems, from energy loss to serious safety hazards, including electrical fires. Improperly connected wires or faulty components can result in poor energy transmission, inefficient system performance, or, in extreme cases, short circuits that pose fire risks.
Common causes of wiring issues include:
- Poor installation: If wires are not securely connected during installation, they can loosen over time, causing interruptions in energy flow.
- Wear and tear: Over time, electrical connections can degrade due to exposure to the elements, especially in outdoor installations. UV light, moisture, and temperature fluctuations can all contribute to the breakdown of wiring insulation.
- Corrosion: In areas with high humidity or coastal environments, wiring connections can corrode, leading to poor conductivity and the potential for short circuits.
The consequences of faulty wiring can be severe:
- Energy loss: Loose or corroded connections can reduce the amount of electricity transmitted from the panels to the inverter or from the inverter to the grid, resulting in lower overall energy production.
- System malfunctions: Faulty wiring can cause the entire system to shut down or underperform, which can lead to downtime and the need for expensive repairs.
- Safety hazards: In the worst-case scenario, wiring issues can lead to electrical fires or shock hazards, putting both your property and your safety at risk.
The Solution:
To prevent wiring issues and ensure the safe and efficient operation of your solar system, follow these essential steps:
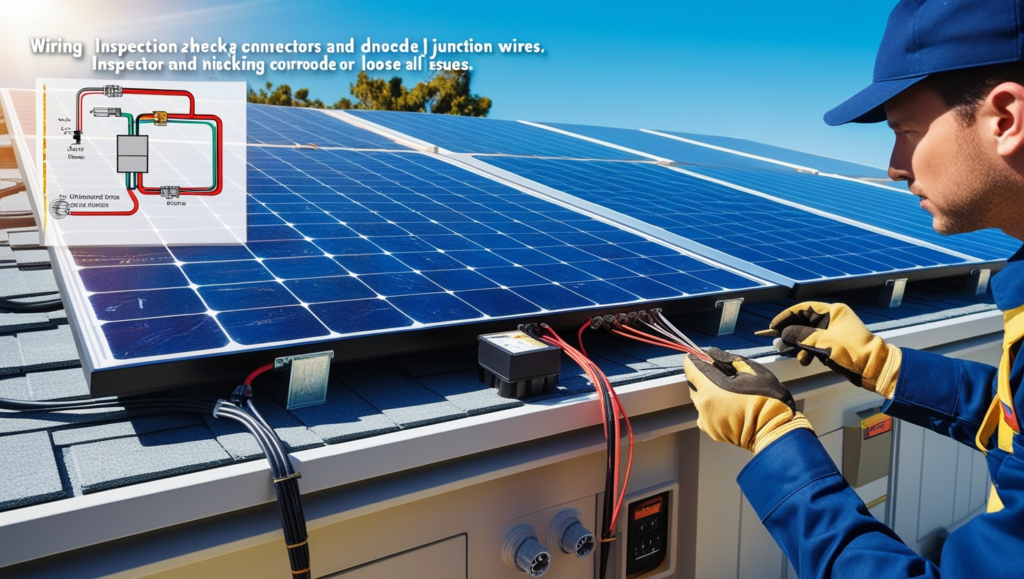
- Schedule Regular Inspections to Identify and Fix Wiring Issues:
- Regular inspections by a certified solar technician are critical to identifying and resolving any wiring problems before they escalate. These inspections should focus on checking the integrity of all connections, especially those exposed to the elements.
- An experienced technician can identify loose connections, worn insulation, or signs of corrosion that may not be immediately visible. Catching these issues early can prevent energy loss and reduce the risk of more serious problems down the line.
- Annual maintenance inspections are recommended, though systems in harsher climates or with a higher risk of wear may benefit from more frequent checks.
- Use High-Quality Materials During Installation to Prevent Premature Wear:
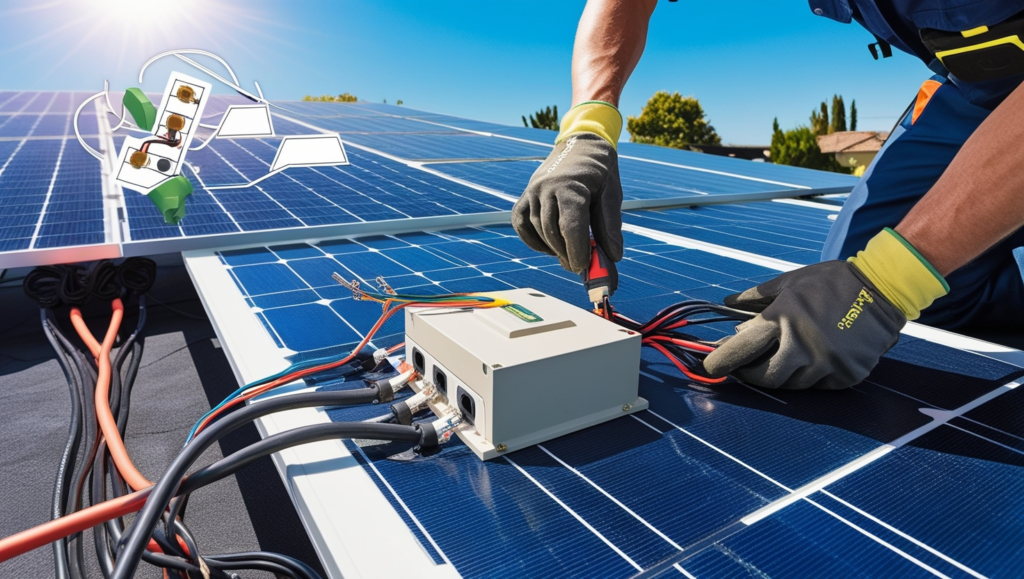
- The quality of the materials used during installation plays a critical role in ensuring long-term system performance. Using high-quality wiring, connectors, and junction boxes can prevent premature wear and reduce the likelihood of electrical faults.
- UV-resistant and weatherproof cables are essential for outdoor installations, where exposure to sunlight, rain, and temperature fluctuations can cause significant degradation over time.
- For safety, ensure that connectors are rated for outdoor use, especially if they are exposed to moisture or extreme temperatures, as improper materials can increase the risk of corrosion and electrical failure.
- Immediately Address Any Visible Signs of Damage or Performance Drops:
- Regularly monitor your system’s performance to identify any sudden drops in energy production or system malfunctions. These could be signs of underlying wiring issues that need attention.
- Visual inspections of cables and connectors are also important. Look for any signs of wear such as fraying, cracking insulation, or discoloration, as these can indicate problems with the wiring.
- If you notice any physical signs of damage or if you observe unusual behavior like flickering lights, reduced energy output, or frequent system shutdowns, address these issues immediately. Consult a qualified installer to inspect and repair the wiring or connections to ensure safe and efficient operation.
- Ensure Proper Grounding and Safety Measures:
- Proper grounding is essential to prevent electrical surges or faults that could lead to fires or equipment damage. During installation, ensure that the system’s wiring is grounded according to local electrical codes and industry best practices.
- Surge protection devices can also be installed to protect your system from power spikes caused by lightning or grid fluctuations.
- Invest in Quality Inverters and Connection Boxes:
- Inverters and connection boxes are the heart of your solar system’s electrical system. Choose high-quality, reliable inverters and junction boxes that are designed for long-term durability and equipped with safety features to prevent wiring-related issues.
- Many inverters now include built-in monitoring systems that alert you to issues like poor wiring or connection
- problems, allowing you to address them before they impact system performance.
5. Weather-Related Damage
Problem: Weather-Related Damage
Solar panels are built to withstand various environmental conditions, but extreme weather events like hailstorms, heavy snow, and strong winds can still cause significant damage. Hail can crack or shatter panel surfaces, snow can add excessive weight, and wind can loosen mounting structures. This is especially concerning in areas prone to harsh weather, where such damages may lead to reduced efficiency or costly repairs.
Solution: Protecting Solar Panels from Weather Damage
- Invest in Durable Panels
Opt for solar panels specifically designed to endure extreme climates. Many manufacturers test their panels for impact resistance, wind tolerance, and weight-bearing capacity. Look for certifications like IEC 61215, which indicate enhanced durability under rigorous conditions. - Install Protective Covers or Coatings
Protective covers or tempered glass coatings can shield panels from hail and debris impacts. These add a layer of resilience without compromising the panels’ ability to absorb sunlight. - Secure Mounting Systems
Ensure the mounting system is robust and properly anchored to resist strong winds. For regions prone to hurricanes or high winds, consider low-profile mounting systems designed to reduce wind uplift. - Clear Snow and Debris Promptly
After heavy snowfall, clear snow from panels using a soft-bristle brush or a snow rake designed for solar panels. Avoid tools that might scratch or damage the surface. Similarly, remove debris like fallen branches or leaves to prevent strain on the system. - Use Tilted Panels
Installing panels at an angle can help snow and debris slide off naturally. Additionally, tilted panels improve energy efficiency by optimizing sunlight exposure. - Consider Insurance Coverage
Check your homeowner’s insurance policy or consider additional coverage for your solar system to protect against weather-related damage. This can provide financial peace of mind in case of extreme weather events.
By implementing these measures, you can safeguard your solar panels from the effects of extreme weather, ensuring consistent performance and extending the lifespan of your investment.
6. Aging Components
The Problem:
While solar panels themselves are long-lasting, other components like inverters and batteries degrade over time, affecting overall system performance.
The Solution:
- Replace inverters every 5–10 years as recommended by the manufacturer.
- Inspect batteries regularly and upgrade to newer, more efficient models if needed.
- Conduct a comprehensive system audit every few years.
7. Inverter Malfunctions
Problem: Inverter Malfunctions
Inverters play a crucial role in converting the direct current (DC) generated by your solar panels into alternating current (AC) that powers your home. When an inverter malfunctions, it disrupts this process, leading to energy losses and reduced system efficiency. Common issues include overheating, wear and tear over time, or software glitches in advanced models.
Solution: Ensuring Optimal Inverter Performance
- Monitor Inverter Performance Regularly
Use solar monitoring apps or systems provided by your installer to track inverter performance. These tools can alert you to irregularities, such as reduced output or error codes, allowing you to address issues promptly. - Schedule Routine Maintenance
Inverters, like any electrical component, require regular maintenance. Schedule professional inspections every 1-2 years to check for loose connections, overheating, or component degradation. This can extend the life of your inverter and ensure consistent energy production. - Maintain Proper Ventilation
Overheating is a common cause of inverter failure. Make sure the inverter is installed in a well-ventilated area, away from direct sunlight or extreme temperatures. Adding a small fan or shade can help maintain optimal operating conditions. - Update or Upgrade When Necessary
Older inverters may struggle to keep up with advances in solar technology or increased energy demands. If your inverter is outdated or frequently malfunctioning, consider replacing it with a modern, efficient model. Newer inverters often include smart features like real-time monitoring and improved energy conversion rates. - Understand Warranty Coverage
Most inverters come with warranties ranging from 5 to 10 years. Familiarize yourself with the terms of your inverter’s warranty to ensure you can access repairs or replacements if needed.
By proactively maintaining and upgrading your inverter, you can prevent energy losses, maximize your solar system’s efficiency, and ensure long-term reliability.
8. Overheating
The Problem:
Excessive heat is a common issue that affects the efficiency of solar panels, particularly in regions with consistently high temperatures or during peak summer months. Solar panels are designed to operate within a specific temperature range, and when temperatures rise too high, their efficiency decreases. This is due to the fact that solar panels, like most electronic devices, have an optimal operating temperature. If the temperature exceeds this range, the panels start to lose their ability to convert sunlight into electricity effectively.
High temperatures can:
- Reduce the voltage output: As the temperature of the solar panel increases, the voltage generated by the panel decreases, leading to reduced overall energy production. This phenomenon is known as the “temperature coefficient,” which quantifies the panel’s performance degradation with rising temperatures.
- Increase the risk of component wear and tear: Excessive heat can accelerate the aging process of the panel components, such as the inverter, wiring, and frame, which may lead to premature failure.
- Create thermal stress: Panels can experience thermal stress when exposed to extreme heat, which can result in cracking, warping, or delamination of the panel layers over time, ultimately reducing their lifespan.
The Solution:
There are several ways to mitigate the impact of excessive heat on solar panel performance:
- Install Panels with a Low Temperature Coefficient:
- The temperature coefficient is a key specification to consider when selecting solar panels. This value indicates how much the panel’s efficiency decreases as the temperature rises. Panels with a lower temperature coefficient are less affected by high temperatures and will continue to produce power more efficiently in hot climates.
- When choosing panels for your system, opt for brands that specifically advertise low-temperature coefficients. High-efficiency panels like monocrystalline solar panels tend to perform better in hot conditions compared to polycrystalline or thin-film panels, as they generally have a lower temperature coefficient.
- Ensure Adequate Ventilation Under the Panels:
- Proper ventilation is crucial for reducing heat buildup under the solar panels. If the space between the panels and the roof is too tight, heat can become trapped and cause the panels to overheat. This is why it’s essential to allow space for airflow underneath the panels.
- Install panels with a sufficient gap from the roof surface to allow air to circulate freely. This helps in dissipating the heat that accumulates during the day, preventing the panels from reaching excessive temperatures.
- Additionally, roof-mounted systems should take into account the type of roof material, as certain materials (like dark-colored or low-reflectivity roofs) can trap more heat. Choosing a reflective roof coating can help reduce the amount of heat absorbed by the panels.
- Consider Tilting Panels to Allow Airflow and Reduce Heat Buildup:
- The angle of tilt at which solar panels are installed also influences heat dissipation. Panels that are installed flat against the roof surface may have restricted airflow, leading to heat retention.
- By tilting the panels at an optimal angle, you can allow air to flow more freely underneath the panels, which helps in cooling them down. The ideal tilt angle may vary depending on your geographic location and the time of year, but even a slight tilt can significantly improve ventilation and reduce heat buildup.
- Additionally, make sure the panels are not placed in direct contact with surfaces that can increase heat absorption, such as dark-colored roof shingles. Elevated mounting systems can improve airflow and reduce the heat trapped between the panels and the roof.
- Choose Panels Designed for High Temperatures:
- Some manufacturers produce solar panels specifically designed for high-temperature environments. These panels are built with materials that can withstand the effects of high heat without suffering performance degradation. If you live in a region with extreme temperatures, consider investing in these heat-resistant panels.
- These panels often feature advanced cooling technologies or enhanced durability against high thermal stress, making them more suitable for hot climates.
- Monitor System Performance:
- Regularly monitor the performance of your solar energy system using solar tracking apps or a smart inverter system. If you notice a drop in performance during hot weather, this could be an indication that your panels are overheating, and you may need to implement additional cooling strategies.
9. Delamination and Micro-Cracks
The Problem:
Over time, solar panels are exposed to various environmental factors, such as intense sunlight, temperature fluctuations, rain, hailstorms, and snow. These conditions, combined with manufacturing defects, can lead to delamination and micro-cracks in the panels. Both of these issues can significantly reduce the efficiency of the solar system, resulting in lower energy output.
- Delamination:
- Delamination occurs when the layers of the panel (such as the protective glass, photovoltaic cells, and backing sheet) begin to separate. This can happen due to poor manufacturing, exposure to excessive moisture, or prolonged thermal cycling (rapid heating and cooling). When the layers separate, it disrupts the solar panel’s structure, leading to decreased performance.
- Micro-Cracks:
- Micro-cracks are tiny fractures that form in the panel’s photovoltaic cells, often caused by physical stress, temperature extremes, or minor impacts. These cracks are not always visible to the naked eye but can still affect the panel’s electrical output. Over time, they can worsen, leading to more significant damage and energy loss.
Both delamination and micro-cracks can be accelerated by:
- Improper installation: Panels that are not installed securely or are exposed to mechanical stress (e.g., strong winds, vibrations) can develop cracks or begin delaminating.
- Extreme weather: Hail, heavy snow, or high winds can cause physical impacts that lead to cracks or damage the panel’s structure. Similarly, extreme temperature fluctuations can contribute to the expansion and contraction of materials, causing delamination.
The Solution:
To minimize the risk of delamination and micro-cracks and to address any issues promptly, consider the following steps:
- Opt for High-Quality Panels with Warranties That Cover Manufacturing Defects:
- When purchasing solar panels, prioritize high-quality brands that offer long-term warranties (typically 10–25 years) against manufacturing defects, including delamination and micro-cracks. A solid warranty ensures that the manufacturer will address any defects or issues caused by improper construction or faulty materials.
- Tier 1 solar panel manufacturers are generally known for producing high-quality panels with better reliability, so investing in these brands can help mitigate the risk of delamination or cracking.
- Additionally, check the panel’s performance warranty, which guarantees a certain level of energy production over time. If your panels are underperforming due to these issues, the warranty should cover repairs or replacements.
- Inspect Panels for Visible Damage and Address Issues Promptly:
- Regularly inspect your solar panels for visible signs of damage, including cracks, bubbling, or separation of layers. Early detection can prevent further damage and loss of efficiency.
- If you notice any physical damage, especially on the panel’s surface or edges, contact a professional installer or technician to evaluate the damage. They can help determine if the damage is superficial or if it compromises the panel’s ability to produce energy.
- If delamination or significant cracks are found, replacement of the affected panels may be necessary to restore optimal system performance.
- Protect Panels from Heavy Impacts or Extreme Temperatures:
- Protect your panels from physical impacts such as flying debris, hail, or tree branches that could cause cracks or delamination. If you live in an area prone to hailstorms, consider installing hail-resistant solar panels or adding protective covers to shield the panels during extreme weather.
- Avoid placing heavy objects on the panels or nearby areas, as this can cause stress and lead to micro-cracks or structural damage.
- Shield panels from extreme temperatures by ensuring they are adequately ventilated (as mentioned in the section on overheating). Rapid temperature fluctuations can exacerbate thermal stress, leading to cracking or delamination. Installing your solar panels in areas that do not experience extreme temperature swings can help extend their lifespan.
- Monitor System Performance:
- Consistently monitoring your solar system’s performance through solar apps or monitoring software can help you detect any decline in energy production that might be related to delamination or micro-cracks. A sudden drop in energy output could indicate that your panels are no longer performing at optimal levels due to internal damage.
- If performance degradation is detected, it’s important to have the panels inspected immediately to identify and address any underlying issues.
- Choose Panels with Durable Materials:
- Some solar panels are built with more robust materials that are resistant to delamination and cracking. For example, glass-glass panels (instead of the traditional glass-backsheet construction) offer better protection against environmental stressors. These panels are less prone to delamination because both sides are made of tempered glass, which provides added durability.
- Additionally, certifications like IEC 61215 (which tests panels for durability and weather resistance) and UL 1703 (which assesses overall panel safety) can help you identify reliable and durable panels.
10. Software Glitches
The Problem:
Modern solar systems often rely on sophisticated monitoring software and optimization algorithms to track the performance of the solar panels, manage energy storage, and ensure efficient operation. These systems provide real-time data on energy production, consumption, and system health, giving users and installers a detailed overview of how well the system is performing.
However, software errors or glitches can cause problems that lead to:
- Inaccurate performance data: If the software malfunctions, it may provide incorrect readings of energy output, battery charge levels, or overall system efficiency. This can lead to faulty conclusions about the system’s health, potentially leading to unnecessary repairs or adjustments.
- Reduced energy optimization: Many solar systems feature software that optimizes energy use, such as adjusting battery charging cycles or directing excess power to specific appliances. A malfunctioning system might fail to perform these optimizations, leading to reduced efficiency and wasted energy.
- System malfunctions: In some cases, software issues can cause the entire system to underperform, triggering warning messages or system shutdowns. This can result in loss of power generation, higher energy costs, or the need for technical support.
The root causes of software issues may include:
- Bugs or software errors: Like any other digital technology, solar system software can have bugs that prevent it from functioning correctly.
- Compatibility issues: Updates to other components (like inverters or energy storage systems) may not be compatible with the software, causing errors.
- Connectivity problems: Poor internet or network connections can disrupt data transmission, leading to delays or inaccuracies in monitoring.
The Solution:
To minimize the impact of software glitches and ensure your system is running smoothly, consider the following solutions:
- Keep Monitoring Software Updated to the Latest Version:
- Just like any other software, solar monitoring platforms receive updates that fix bugs, enhance functionality, and introduce new features. Keeping your system’s monitoring software up-to-date is crucial for preventing and resolving software-related issues.
- Enable automatic updates if the software allows it, or regularly check for manual updates through the software interface or app. Updates often improve the software’s compatibility with newer hardware, optimize energy management algorithms, and correct previously identified issues.
- If your software provider offers patch notes or documentation with each update, review them to understand what fixes or improvements have been made.
- Regularly Check Performance Metrics to Ensure Accurate Readings:
- Regular monitoring of your system’s energy output and performance data is essential for identifying discrepancies or glitches early on. Most modern solar systems offer apps or online dashboards that provide real-time data on power production, consumption, and storage levels.
- Ensure that the energy output readings on the dashboard align with your expectations based on weather conditions, time of day, and the system’s specifications. If you notice a significant drop in energy production or unusually high readings that don’t correspond to actual usage, this might indicate a software issue.
- Track performance trends over time. If the system was performing well previously and suddenly shows a decline, software errors could be the cause. Comparing current performance to past data can help identify anomalies.
- Contact Your Installer or Software Provider if You Encounter Persistent Errors:
- If you notice recurring issues, such as inaccurate data, frequent system shutdowns, or persistent error messages, contact your installer or software provider for assistance. They can help troubleshoot the issue and determine whether it’s related to the software or if it’s a deeper technical problem with the hardware.
- Many solar system manufacturers and monitoring software providers offer customer support services that can remotely diagnose and resolve software issues. They may also provide you with guidance on resetting the system, reinstalling software, or updating firmware to fix the problem.
- If the issue is related to incompatibility between the software and hardware, your installer may need to perform a system update, hardware replacement, or other technical adjustments to restore full functionality.
- Ensure Stable Internet or Network Connectivity:
- Since modern solar systems rely on constant data transmission to cloud-based platforms, it’s important to ensure that your internet connection is stable. Poor or intermittent connectivity can lead to delays in data updates, inaccurate readings, or system malfunctions.
- Check the status of your internet connection regularly, especially if you notice that data is not updating or there are significant gaps in your system’s performance history. If you’re using a cellular connection, consider upgrading to a more reliable network if issues persist.
- Use Backup Systems for Critical Monitoring:
- If software issues are frequent or cause system downtime, consider having a backup monitoring system that can provide basic performance data. This can be especially important for large solar systems where downtime or inaccuracies in energy reporting could lead to financial losses or operational inefficiencies.
- Some advanced systems also have offline diagnostic tools that can still monitor basic energy production, even if the software or internet connection fails. These can be helpful as a secondary measure for performance tracking.
Conclusion
In conclusion, understanding and proactively addressing the common issues that can affect solar panels is crucial for ensuring the long-term efficiency and reliability of your solar energy system. Whether it’s managing shading, preventing overheating, addressing delamination, or tackling software glitches, taking the right steps to maintain your system will help you avoid costly repairs, reduce downtime, and enhance overall performance.
Regular maintenance—combined with professional installation and timely monitoring—is the foundation for optimizing your solar energy investment. By taking care of the small details, such as cleaning panels, ensuring proper ventilation, and keeping software updated, you not only extend the lifespan of your panels but also maximize their energy output, ensuring that they continue to provide clean, sustainable power for years to come.
Solar energy offers tremendous benefits, both financially and environmentally, but to truly unlock its full potential, it’s essential to stay vigilant and proactive. With the right knowledge and approach, you can enjoy the full rewards of a well-maintained solar system, creating a cleaner, more energy-efficient future for yourself and your community.


2 thoughts on “Common Solar Panel Problems: Identification and Solutions”
Comments are closed.