Starting a DIY solar panel project can save you money and help the environment.
But, you need the right tools and equipment for a safe and successful job. This guide will show you what you need, from mounting hardware to safety gear and site tools.
Key Takeaways
- Familiarize yourself with the essential tools and equipment required for a DIY solar panel installation
- Understand the importance of proper mounting hardware, including racking systems and roof attachments
- Explore the electrical wiring and components needed to integrate your solar panels with your home’s power supply
- Recognize the value of personal protective equipment and solar site assessment tools for a safe and efficient installation
- Discover the benefits of taking on a DIY solar panel project, such as cost savings and increased energy independence
Introduction to DIY Solar Panel Installation
Starting a DIY solar panel installation project is exciting and rewarding. You can save money and learn about the technology that powers your home. We’ll look at the benefits of doing it yourself and what tools you need for success.
Benefits of Installing Solar Panels Yourself
- Cost savings: DIY solar panel installation can save you money by cutting out labor costs.
- Hands-on learning: You’ll learn valuable skills that can help with future home projects.
- Customization: DIY lets you tailor the system to your needs, ensuring it works best for you.
- Sense of accomplishment: Installing solar panels yourself is very satisfying.
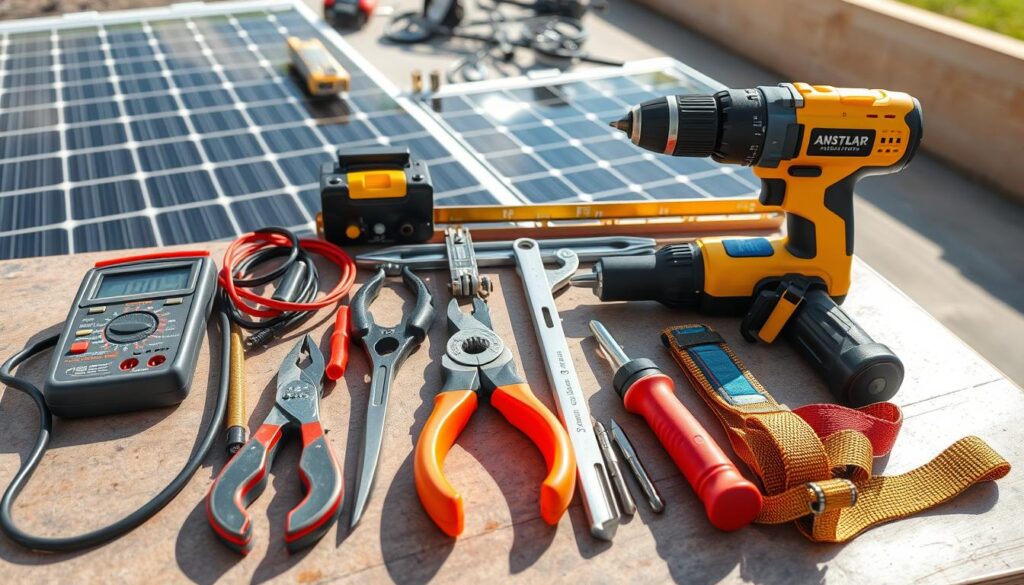
Overview of Essential Tools and Equipment Needed
To start a DIY solar panel installation, you need the right tools and equipment. This includes solar panels, inverters, mounting hardware, electrical wiring, and personal protective equipment (PPE). Knowing what you need helps you prepare for a safe and successful project.
| Essential Tools and Equipment | Description |
|---|---|
| Solar Panels | The main parts that turn sunlight into electrical energy. |
| Inverters | Devices that change the solar panels’ direct current (DC) into alternating current (AC) for your home. |
| Mounting Hardware | Racking systems and brackets to attach the solar panels to your roof or ground. |
| Electrical Wiring | Cables and connectors to connect the solar panels, inverters, and your home’s electrical system. |
| Personal Protective Equipment (PPE) | Items like gloves, safety glasses, and hard hats to keep you safe during installation. |
Knowing the benefits of DIY solar panel installation and what tools you need is key. You’re ready to start a successful and rewarding project. Next, we’ll explore the specific tools and equipment needed for a DIY solar panel installation.
Essential Tools and Equipment Needed for DIY Solar Panel Installation
Starting a DIY solar panel project requires the right tools and equipment. You’ll need solar panels, mounting hardware, electrical wiring, and more. This section covers the key items for a successful installation.
Solar Panels
Solar panels are at the core of your system. They turn sunlight into electricity. Choose panels that fit your energy needs and space.
Mounting Hardware
Mounting hardware keeps your panels in place. You’ll need racking systems, brackets, and roof attachments for a secure, weatherproof setup.
Electrical Wiring and Components
Safe and efficient operation depends on proper wiring. You’ll need quality wiring, inverters, charge controllers, and batteries for energy storage.
| Essential Tools and Equipment | Description |
|---|---|
| Solar Panels | Photovoltaic modules that convert sunlight into electricity |
| Mounting Hardware | Racking systems, mounting brackets, roof attachments, and flashing to securely install the solar panels |
| Electrical Wiring | High-quality cables and connectors to transmit the solar-generated electricity |
| Inverters | Devices that convert the solar-generated DC power to AC power for use in your home |
| Charge Controllers | Components that regulate the flow of electricity to and from the battery storage system |
| Batteries | Energy storage devices that allow you to utilize solar power even when the sun isn’t shining |
Having the right tools and equipment is key to a successful DIY solar panel installation. It’s the first step to using solar power for your home or business.
Solar Panel Mounting Hardware
Installing solar panels requires the right mounting hardware for stability and longevity. This includes racking systems, mounting brackets, and roof attachments. Each part is key for proper installation and alignment.
Racking Systems and Mounting Brackets
Racking systems are the base for your solar panels, mounting them securely to roofs or surfaces. They come in designs like flush-mounted and tilted to boost energy production. Mounting brackets add extra support, keeping panels firm against the weather.
Roof Attachments and Flashing
Roof attachments and flashing prevent leaks and protect your solar panel setup. Attachments like lag bolts hold the racking system to your roof. Flashing materials seal any holes, keeping your home dry and your system weatherproof.
| Component | Purpose | Key Considerations |
|---|---|---|
| Solar Panel Racking Systems | Provide the structural foundation for mounting solar panels | Variety of designs (flush-mounted, tilted) to optimize solar panel orientation |
| Mounting Brackets | Secure solar panels to the racking system | Offer additional support and stability for the solar panels |
| Roof Attachments | Connect the racking system to the roof | Lag bolts, expansion anchors, and other secure fasteners |
| Flashing | Seal roof penetrations to prevent water damage | Weatherproof the solar panel installation and protect the roof |
Choosing the right solar panel mounting hardware is crucial for a stable and safe DIY system. These parts work together to make your home’s solar energy solution efficient and reliable.
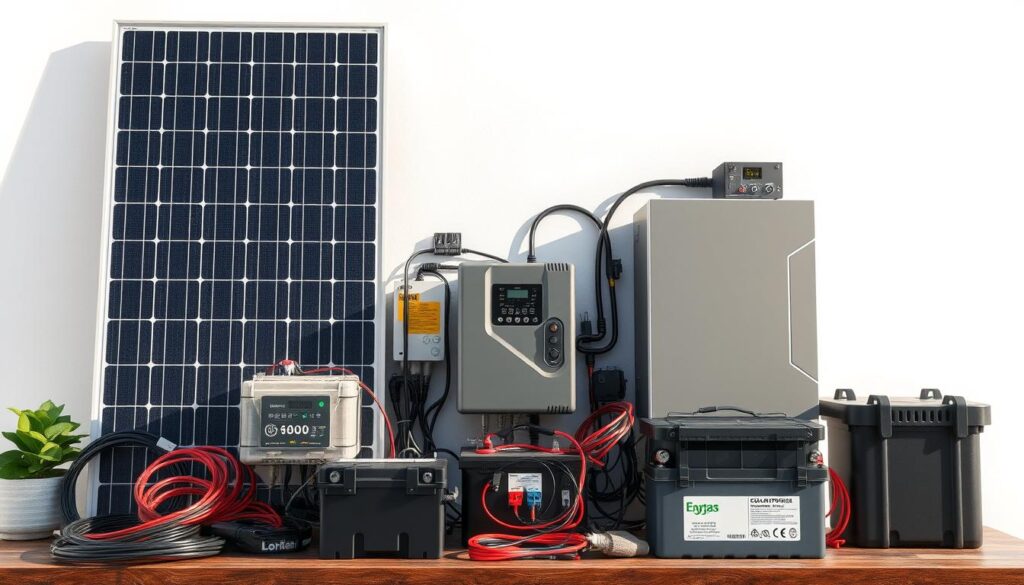
Electrical Wiring and Components
Starting a DIY solar panel project means knowing about key electrical parts. These parts include inverters, charge controllers, and batteries. They work together to change, control, and save energy from your solar panels.
Inverters are vital. They turn the direct current (DC) from solar panels into alternating current (AC) for your home. Picking the right inverter, like a string inverter or micro-inverter, affects your system’s efficiency.
Charge controllers manage the flow of electricity from panels to batteries. They stop overcharging and keep batteries healthy. This helps your solar panel installation last longer and work better.
Batteries store energy for when the sun isn’t out. Choosing the right battery type and size is key for a reliable, off-grid power system.
| Component | Purpose | Key Considerations |
|---|---|---|
| Inverters | Convert DC to AC power | String inverters vs. micro-inverters, efficiency, compatibility |
| Charge Controllers | Regulate energy flow to batteries | Voltage and current regulation, maximum power point tracking |
| Batteries | Store generated solar energy | Battery type, capacity, depth of discharge, lifespan |
Learning how to use these electrical wiring and parts is key for your DIY solar project. By knowing their roles and making the right choices, you can build a reliable, efficient solar system for your home.
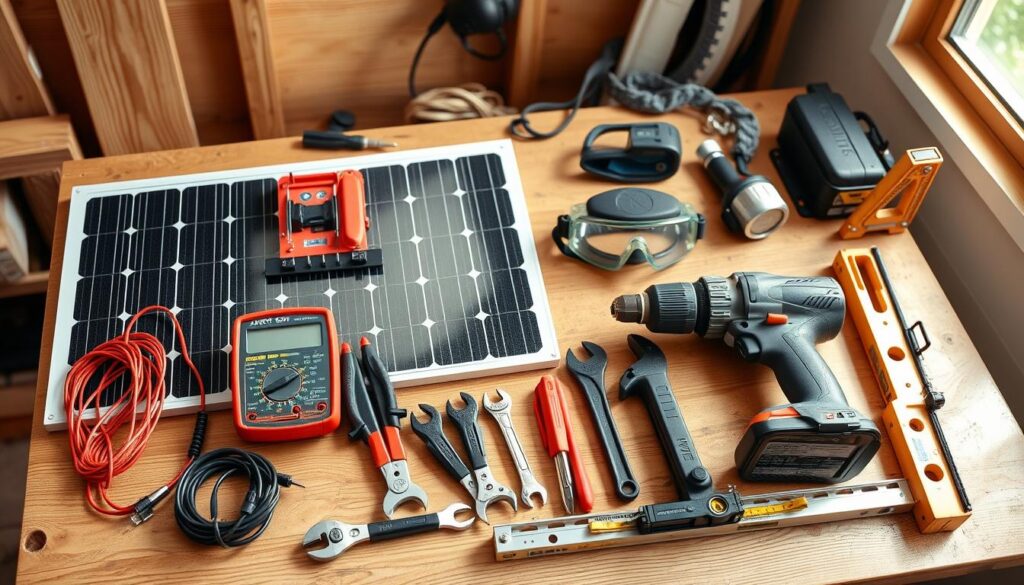
Safety Gear and Site Assessment Tools
When starting a DIY solar panel project, safety is key. You need the right personal protective equipment (PPE) and tools for a safe installation. Let’s look at what you need.
Personal Protective Equipment
Keeping yourself safe is vital. Make sure to get good safety equipment like:
- Sturdy work gloves to protect your hands from sharp edges and hot surfaces
- Slip-resistant work boots with steel or composite toes for extra protection
- Safety goggles to protect your eyes from debris, glare, and UV radiation
- A hard hat to prevent injuries from falling objects or impacts
- A respirator mask to filter out dust and fumes during the installation
Solar Site Assessment Tools
Before you start, you need to check your site. Use solar site assessment tools to get important data for your diy solar panel installation:
- Solar irradiance meter: Check the sunlight and find the best spot for your panels
- Roof angle protractor: Find the best tilt and direction for your panels to get the most energy
- Shading analysis tool: See if any shadows could affect your system’s performance
- Compass: Find the true north orientation of your roof or site
With the right personal protective equipment and solar site assessment tools, you can start your DIY solar panel project safely and confidently.
Conclusion
In this guide, we’ve looked at the key tools and equipment for a DIY solar panel setup. We’ve covered everything from mounting hardware to electrical parts. This ensures your solar power project is done safely and well.
Whether you’re experienced or new to solar, having the right tools and knowledge is key. With the right solar site tools, safety gear, and mounting systems, you can use the sun’s power. This reduces your need for traditional energy.
Starting your DIY solar panel project? Keep this guide handy. Knowing the essential tools will help you succeed. Stay safe, enjoy the challenge, and feel good about making your own renewable energy.
FAQ
What are the essential tools and equipment needed for a DIY solar panel installation?
For a DIY solar panel installation, you’ll need solar panels and mounting hardware. This includes racking systems, mounting brackets, and roof attachments. You’ll also need electrical components like inverters, charge controllers, and batteries. Don’t forget safety gear, including personal protective equipment and solar site assessment tools.
What type of mounting hardware do I need for my solar panels?
You’ll need racking systems and mounting brackets to hold your solar panels securely. Roof attachments and flashing are also necessary to integrate the panels with your roof.
What electrical components are required for a DIY solar panel installation?
You’ll need inverters to convert DC power from your solar panels to usable AC power. Charge controllers regulate electricity flow to your batteries. And, you’ll need batteries to store the solar energy for later use.
What safety equipment should I have for a DIY solar panel installation?
Safety is key. You’ll need personal protective equipment (PPE) like harnesses, gloves, and eye protection. Also, solar site assessment tools are crucial to ensure your installation meets your location and energy needs.
Where can I find detailed guides on how to install solar panels myself?
Online resources and tutorials offer step-by-step guides for DIY solar panel installation. They cover site assessment to final system integration.


