Introduction:
Solar panels are a valuable step toward embracing clean and renewable energy, offering long-term savings and environmental benefits. However, to ensure they perform at their peak efficiency and have a long lifespan, regular care and attention are essential. Issues like dirt accumulation, weather damage, or faulty components can undermine your system’s effectiveness. By following these ten tips, you’ll not only prevent common problems but also enhance the overall reliability and output of your solar energy system, ensuring your investment delivers the maximum benefits over time.
1. Choose High-Quality Panels
When it comes to solar energy systems, the quality of your solar panels plays a pivotal role in the long-term performance and reliability of your system. Investing in high-quality panels from reputable manufacturers ensures that your solar energy system can withstand environmental stressors, operate efficiently for years, and ultimately provide the best return on your investment. Though premium panels may come with a higher upfront cost, they offer significant benefits that make them a cost-effective choice in the long run.
Why Quality Matters
Solar panels are exposed to various environmental conditions, from extreme temperatures to UV rays, heavy rain, and wind. The durability and efficiency of your panels will determine how well they perform over time. High-quality panels are designed to handle these stressors without compromising performance. By choosing top-tier panels, you are investing in a system that will continue to generate clean, reliable energy for years to come, ensuring long-term savings on your electricity bills.
Key Features of High-Quality Solar Panels
1. Advanced Materials for Durability
Premium solar panels are made from advanced materials that are designed to resist environmental wear and tear. For example, high-efficiency panels often feature tempered glass, which is more resistant to impacts and scratches. The materials used in these panels are also better equipped to withstand extreme temperatures, UV exposure, and heavy rainfall, all of which can degrade lower-quality panels over time.
2. Rigorous Testing for Efficiency and Longevity
Reputable manufacturers put their panels through rigorous testing to ensure that they meet industry standards for efficiency and durability. High-quality panels are designed to maintain consistent energy production over their lifespan, even under challenging conditions. This testing ensures that the panels deliver reliable performance for 20 to 30 years, giving you confidence in their longevity.
3. Better Efficiency
High-quality panels are generally more efficient at converting sunlight into usable electricity. They are designed to capture more sunlight and convert it into power, even on cloudy days or in less-than-ideal conditions. The higher the efficiency, the more energy your panels will generate, which can significantly reduce your energy costs.
4. Superior Warranties and Customer Support
One of the key advantages of choosing high-quality panels from reputable brands is the warranty and customer support that comes with them. Leading manufacturers often offer extended warranties, sometimes as long as 25 years, which protect you from defects and ensure your system performs optimally. Should any issues arise, you can count on superior customer support to resolve them quickly and efficiently.
The Long-Term Value of Quality Panels
Although high-quality solar panels may have a higher upfront cost, the long-term benefits far outweigh the initial investment. Here’s why:
- Reduced Risk of Premature Failures: Lower-quality panels are more likely to experience issues over time, such as reduced efficiency, physical damage, or even complete failure. High-quality panels, on the other hand, are less prone to such problems, reducing the likelihood of costly repairs or replacements.
- Better Return on Investment (ROI): Premium panels are more efficient, meaning they generate more energy. Over time, this translates to greater savings on your electricity bills. You’ll recover the initial investment faster, and the system will continue to provide savings for years beyond that.
- Fewer Repairs and Maintenance: High-quality panels are built to last and require less maintenance. With a solid warranty backing your purchase, you can rest assured that any issues will be addressed without significant additional costs. This makes high-quality panels a cost-effective choice over the long term, even if the initial investment is higher.
- Increased Home Value: A solar system with high-quality panels can increase the value of your home, as future buyers will appreciate the reliability and efficiency of the panels. High-performance panels can give your home an edge on the market, particularly in areas where renewable energy is in high demand.
How to Choose the Right Solar Panels
When selecting solar panels, it’s important to focus on the following factors:
Certifications: Ensure the panels meet industry standards and are certified by recognized organizations, such as the International Electrotechnical Commission (IEC) or the Underwriters Laboratories (UL).
Brand Reputation: Stick with well-known, reputable brands that have a proven track record of producing high-quality, reliable panels.
Efficiency Ratings: Look for panels with high efficiency ratings, typically in the range of 18% to 22%. Higher efficiency means more energy production per square foot, which translates to greater savings.
Warranty Terms: Check the warranty length and what it covers. Leading brands offer 20–25-year warranties for both performance and product, giving you peace of mind.
2. Ensure Professional Installation
The installation of your solar panels is one of the most crucial steps in ensuring the long-term reliability and efficiency of your solar energy system. A well-executed installation ensures that your panels are securely mounted, positioned for optimal sun exposure, and integrated properly with your electrical system. On the other hand, improper installation can lead to a range of serious issues, from electrical faults to water leakage or even structural damage to your roof. To avoid these problems, it’s vital to hire certified and experienced professionals who are familiar with local building codes and regulations.
Why Professional Installation Matters
While DIY solar installation kits might seem like an attractive option, they often lack the expertise and precision required for a safe and efficient setup. A poor installation can result in underperformance, safety risks, and costly repairs in the future. Hiring a professional installer ensures that your system is set up correctly from the start, reducing the likelihood of these problems and maximizing the efficiency of your solar panels.
What Professional Installers Bring to the Table
Certified solar installers have the knowledge and experience to handle every aspect of the installation process. Here’s what you can expect when you hire a professional:
- Proper Mounting and Alignment: Ensuring that your panels are mounted securely is essential to their longevity and performance. A professional installer will use the right equipment to mount your panels on the roof or ground, ensuring they are positioned at the optimal angle to receive maximum sunlight throughout the day. This alignment directly impacts your system’s energy production.
- Electrical System Integration: Solar panels need to be integrated with your home’s electrical system to convert the captured sunlight into usable power. Professional installers have the expertise to connect your panels to your inverter and electrical wiring safely. They will also ensure that your system is in compliance with local electrical codes, reducing the risk of electrical faults.
- Roof Integrity Evaluation: Before installing panels, a professional will assess your roof’s condition to ensure it can support the added weight of the solar system. They will check for any issues, such as weakened roof structures or leaks, and make necessary adjustments to prevent potential damage. This step is crucial for ensuring the stability and safety of both your roof and your solar panels.
- Compliance with Local Codes and Regulations: Solar installation requires adherence to local building codes, zoning laws, and regulations. A professional installer is familiar with these requirements and ensures that your system meets all legal and safety standards. This helps avoid fines or delays in the installation process.
- Workmanship Warranty: Many certified installers offer warranties on their work, giving you peace of mind knowing that if any issues arise from the installation, they will be covered. This added protection ensures that your investment is secure and that any installation-related problems will be handled promptly and professionally.
The Risks of Improper Installation
While the upfront cost of hiring a professional installer may seem higher than a DIY approach, the potential risks of poor installation far outweigh the savings. Common problems resulting from improper installation include:
- Electrical Issues: Loose connections, incorrect wiring, or poorly integrated systems can lead to electrical faults, which can damage your solar system or pose safety hazards like fires or electrical shocks.
- Water Damage: Improper sealing or mounting of panels can lead to leaks in the roof, which could cause water damage to your home. Leaks can also damage the panels themselves, leading to expensive repairs or replacements.
- Reduced Efficiency: Incorrect panel alignment or poor placement can reduce the amount of sunlight your panels receive, leading to lower energy production. This could result in higher electricity costs and diminished savings over time.
- Structural Damage: If panels are not securely mounted or if the roof is not properly reinforced, the panels may become loose during high winds or storms, causing damage to both the panels and the roof.
The Benefits of Professional Installation
Peace of Mind: Knowing that your installation meets safety standards and is backed by a warranty gives you confidence that your solar system is built to last.
Maximized Energy Production: With proper alignment and positioning, your solar panels will be able to absorb the maximum amount of sunlight, improving energy production and lowering your electricity bills.
Long-Term Reliability: A professionally installed system is less likely to encounter issues down the line. With correct integration and secure mounting, your solar system will function smoothly for years to come.
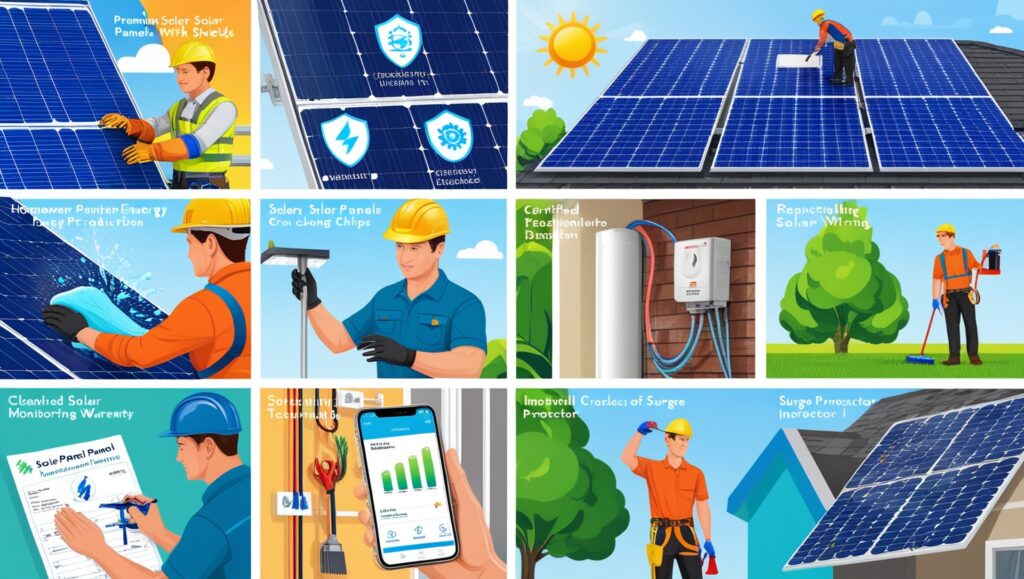
3. Perform Regular Maintenance
Regular maintenance is essential to keep your solar panels functioning efficiently and ensuring that they continue to deliver clean, renewable energy. Over time, your panels can accumulate dirt, dust, bird droppings, and other debris, which can obstruct sunlight and reduce their efficiency. By performing routine maintenance, you can prevent these issues and keep your solar system performing at its best.
Why Regular Maintenance is Important
Even though solar panels are designed to be durable and low-maintenance, they still require periodic attention to ensure optimal performance. Without proper care, dirt and debris can accumulate, blocking sunlight from reaching the solar cells. This reduces the amount of energy your system generates, leading to lower savings on your electricity bills. Additionally, neglecting regular maintenance can lead to more serious issues like physical damage or wiring problems that might require expensive repairs.
Cleaning Your Solar Panels
One of the most important aspects of solar panel maintenance is cleaning. Panels that are covered in dirt and debris can lose a significant amount of their energy-producing potential. To keep your system working efficiently, make sure to clean your panels at least twice a year. If you live in an area with high levels of dust, pollution, or bird activity, you may need to clean your panels more frequently.
Steps for Cleaning Your Solar Panels:
- Use the Right Tools: Always use a soft brush, sponge, or microfiber cloth when cleaning your panels. These materials are gentle enough to remove dirt without damaging the surface of the solar panels. Avoid using abrasive materials that could scratch or harm the panels.
- Non-Abrasive Cleaners: Stick to non-abrasive cleaners or mild dish soap diluted in warm water. Harsh chemicals can damage the panels’ protective coating, reducing their effectiveness and lifespan.
- Avoid High-Pressure Water: High-pressure water sprays or power washers might seem like an easy way to clean, but they can actually damage the solar panels or the wiring. It’s best to use a gentle stream of water or a damp cloth to wipe away debris.
- Consider Professional Cleaning: If your solar panels are located in hard-to-reach places, or if you’re unsure about the cleaning process, consider hiring a professional solar panel cleaning service. They will have the proper tools and expertise to clean your panels safely and thoroughly.
Inspecting Your Solar Panels
While cleaning is important, regular inspections are equally critical for maintaining your system’s health. During your maintenance routine, take the time to inspect your solar panels for any signs of wear or damage.
Key Things to Look For:
- Physical Damage: Check for cracks, chips, or other signs of physical damage caused by extreme weather, falling objects, or debris. Even small cracks can lead to more significant issues if not addressed promptly.
- Loose Wiring: Examine the wiring and connections to ensure they are secure. Loose or frayed wiring can lead to power loss or even present a safety hazard. If you notice any problems, call a professional to fix them.
- Corrosion: Look for signs of corrosion, especially around the metal components or electrical connections. Corrosion can lead to poor performance and can damage your system over time.
- Shading Issues: Trees or nearby structures can cast shadows on your panels, reducing their ability to generate power. Regularly check to ensure that no new obstructions are affecting your panels.
Benefits of Regular Solar Panel Maintenance
Early Problem Detection: By inspecting your panels regularly, you can catch any issues before they develop into larger, more expensive problems. This proactive approach can save you money in the long run.
Optimal Performance: Regular cleaning and inspection ensure that your panels continue to produce energy at their highest possible efficiency, maximizing your savings on electricity bills.
Extended Lifespan: Proper care and maintenance can extend the life of your solar panels, preventing costly repairs or the need for early replacement.
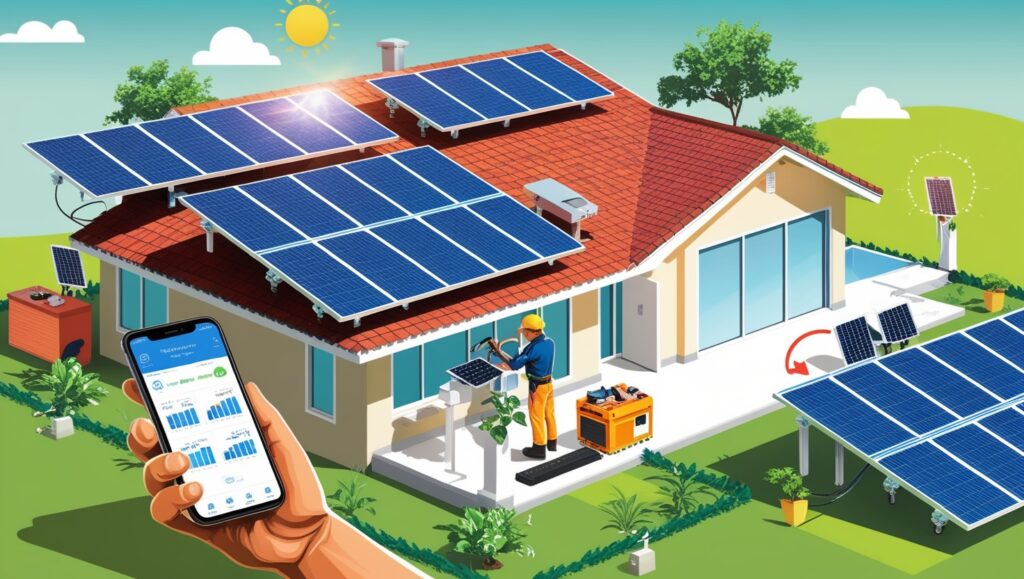
4. Monitor Energy Output
One of the most effective ways to ensure your solar panels are operating at peak efficiency is by consistently monitoring their energy output. By keeping an eye on the energy production of your system, you can catch potential issues early and take corrective actions before they lead to more serious problems.
Why Energy Monitoring is Essential
A sudden drop in energy output could signal a variety of issues, from something as simple as dirt accumulating on the panels to more complex problems like faulty wiring or a malfunctioning inverter. Regular monitoring allows you to identify these fluctuations and take action quickly, minimizing the risk of prolonged inefficiency or system failure.
How to Monitor Your Solar Panel Energy Output
To properly track your solar system’s performance, you can use a solar monitoring system. These systems provide real-time data, allowing you to check not only the overall energy production but also the performance of individual components like inverters and batteries. Many systems offer mobile apps or web dashboards for easy access, so you can check the status of your system anytime, anywhere.
There are two primary ways to monitor your solar panel’s output:
- Inverter Monitoring: Most solar inverters come with built-in monitoring capabilities, allowing you to see how much energy your system is generating. The inverter will display data on energy production, efficiency, and any potential issues. Many modern inverters also allow you to monitor these metrics remotely, making it easy to track your system’s performance on the go.
- Third-Party Monitoring Systems: If your inverter doesn’t include a built-in monitoring system, you can install third-party monitoring devices. These systems offer more detailed insights into your solar energy generation and can track data for individual panels, helping you identify any underperforming components more easily.
What to Look for in Energy Output Monitoring
When monitoring your system, there are a few key indicators to keep an eye on:
- Energy Production: Compare your system’s energy output to the estimated production for the day, month, or year. If you notice a sharp drop in energy generation without any apparent reason (e.g., weather conditions), it might indicate an underlying problem.
- System Performance: Most monitoring systems will provide a performance ratio that compares the actual energy produced to the theoretical output of your solar panels under optimal conditions. A declining performance ratio could signal issues with your system’s efficiency.
- Alerts and Notifications: Many monitoring systems offer alerts for any significant drops in energy production or system malfunctions. These notifications allow you to take immediate action, whether it’s scheduling an inspection or contacting a technician to address the issue.
Benefits of Monitoring Solar Energy Output
- Early Problem Detection: By identifying drops in performance early, you can prevent more severe problems, such as an inverter failure or panel damage, from becoming costly repairs.
- Increased Efficiency: Regular monitoring helps ensure that your system is running at its full potential, maximizing your energy savings and return on investment.
- Longer System Lifespan: With consistent monitoring, you can stay on top of maintenance needs, ensuring your panels and other components last longer and continue producing energy efficiently.
5. Inspect for Physical Damage
Regular inspection of your solar panels is crucial for maintaining their long-term performance and durability. Over time, environmental factors such as extreme weather, high winds, or falling debris can cause physical damage to your panels, potentially reducing their efficiency or causing complete failure. By proactively checking for cracks, chips, or other forms of damage, you can address issues early, preventing further deterioration and ensuring your system continues to operate at its best.
Why Physical Damage Matters
Solar panels are designed to withstand various weather conditions, but they are not invincible. Physical damage, even if minor, can significantly impact the efficiency of your system. For instance, a cracked panel may allow water to seep in, causing internal damage that could lead to electrical issues or even complete failure. Additionally, any physical damage can reduce the amount of sunlight that reaches the solar cells, resulting in lower energy production. Regularly inspecting your panels helps you catch these issues early, minimizing the risk of costly repairs or replacements.
What to Look for During Inspection
When inspecting your solar panels, pay attention to the following potential signs of physical damage:
1. Cracks and Chips
Cracks can develop from impacts caused by hail, falling branches, or other debris. Even a small crack can compromise the integrity of the panel and reduce its ability to absorb sunlight. Chips in the glass can also create weak spots, which may lead to further damage. If you notice any cracks or chips, it’s important to address them immediately before they worsen.
2. Dents or Deformities
Heavy storms, hail, or fallen objects can cause dents or deformities in your panels. While small dents may not seem like a major issue, they can affect the performance of the panels by blocking sunlight or damaging the internal components. Regularly check for any visible dents and monitor the performance of your system to ensure it is operating efficiently.
3. Discoloration or Streaking
Discoloration or streaking on the surface of your panels could be a sign of physical damage or wear, particularly if caused by exposure to extreme temperatures or UV radiation. While some surface streaking can result from dirt or moisture buildup, persistent discoloration may indicate deeper issues, such as damage to the panel’s protective coating.
4. Loose or Missing Mounting Hardware
If the mounting brackets or screws securing your panels are loose or missing, it can lead to instability or shifting of the panels. Loose mounting hardware can also cause structural damage to your roof or the panels themselves. During your inspection, make sure all mounting hardware is tight and secure.
5. Visible Water Damage
If you notice any signs of water damage around your panels or on the roof, it could indicate a leak. Water seeping into the panels can cause significant damage to the internal components, leading to a decrease in performance or even complete system failure. Be sure to check for signs of water ingress, especially after heavy rain or storms.
How to Inspect Your Panels Safely
Inspecting your solar panels should be done with care to avoid causing additional damage or injuring yourself. Here are some tips for conducting a safe and effective inspection:
- Use a Ladder or Professional Service: If your panels are located on the roof, use a sturdy ladder to safely access the area. If you’re not comfortable being on the roof, consider hiring a professional to inspect your panels regularly.
- Check During Low-Light Conditions: Inspect your panels during early morning or late afternoon when the sun is not directly overhead. This will allow you to see any cracks or damage that may be difficult to spot under bright sunlight.
- Wear Protective Gear: Always wear gloves and appropriate footwear when inspecting your panels to protect yourself from sharp edges or debris.
What to Do If You Find Damage
If you discover any physical damage during your inspection, it’s important to take action promptly. Here’s what you should do:
- Minor Damage: For small cracks or chips, you may be able to have the panel repaired by the manufacturer or a professional solar technician. In some cases, the damage may not require a full replacement, but it should be assessed to ensure it doesn’t worsen over time.
- Major Damage: If the damage is more severe, such as a large crack or dent, it may be necessary to replace the panel entirely. Severe damage can lead to reduced energy output or even safety hazards, so it’s crucial to address it promptly.
- Professional Help: If you’re unsure about the extent of the damage or how to fix it, contact a professional solar installer or technician. They can assess the situation and recommend the best course of action.
Benefits of Regular Physical Inspections
- Maximized Efficiency: By identifying and addressing physical damage early, you can prevent further degradation of the panel’s performance, ensuring your solar system operates at its peak efficiency.
- Prolonged Lifespan: Regular inspections help extend the lifespan of your solar panels by catching and fixing minor issues before they turn into more significant problems.
- Reduced Repair Costs: Addressing damage early can help avoid costly repairs or replacements. A proactive approach ensures that you don’t face unexpected expenses down the line.
6. Protect Against Hot Spots
Hot spots are a common issue for solar panel systems, and they can significantly reduce the performance and lifespan of your panels. These hot spots occur when certain areas of a solar panel overheat, often due to shading, dirt, or other obstructions that prevent sunlight from reaching the cells evenly. When a panel overheats, it can cause damage to the internal components, leading to decreased efficiency, potential system failure, and costly repairs. Protecting against hot spots is crucial to ensuring that your solar panels operate at their highest efficiency and last as long as possible.
What Are Hot Spots and Why Do They Occur?
Hot spots happen when one part of a solar panel becomes much hotter than the surrounding areas. This temperature imbalance can cause stress on the solar cells, leading to a variety of issues, including:
- Reduced energy output: Overheating can cause certain cells to stop functioning properly, lowering the overall energy production of the panel.
- Damage to the panel: Prolonged hot spots can damage the solar cells or the connections within the panel, potentially leading to permanent failure.
- Decreased lifespan: Panels with frequent hot spots may not last as long as those that are properly maintained, reducing the overall return on investment.
The primary causes of hot spots include shading, dirt accumulation, and the internal damage of a panel. Any blockage of sunlight—whether from trees, nearby buildings, or debris—can create uneven heating, leading to hot spots.
How to Protect Your Panels from Hot Spots
1. Keep Panels Clean
One of the simplest ways to prevent hot spots is to regularly clean your solar panels. Dirt, dust, bird droppings, and other debris can block sunlight from reaching the surface of the panel, creating shaded areas that can overheat. By cleaning your panels at least twice a year (or more often in dusty or polluted areas), you help ensure that sunlight is evenly distributed across the surface of the panels, minimizing the risk of hot spots.
When cleaning, avoid harsh chemicals or abrasive materials that could scratch or damage the surface. Instead, use a soft brush, sponge, or microfiber cloth and a gentle, non-abrasive cleaner. This will remove dirt and debris without harming the panel’s protective coating.
2. Ensure Proper Panel Placement
Before installing your solar panels, make sure they are placed in an area where they will receive maximum sunlight exposure throughout the day. Avoid locations where trees, buildings, or other structures could cast shadows on the panels. Even partial shading can create hot spots, as the areas with less sunlight will heat up more quickly than the rest of the panel.
If your solar panels are already installed, check to see if any nearby trees or structures have grown taller or wider over time, causing new shading. Trim or remove any obstructions that may create shade, especially during peak sunlight hours, to ensure your panels are exposed to as much direct sunlight as possible.
3. Optimize Panel Orientation and Angle
The angle at which your panels are installed can also impact their exposure to sunlight. Ensure that your panels are mounted at the optimal tilt and orientation for your location, which will allow them to capture the most sunlight throughout the day.
A professional solar installer can help you determine the best angle for your panels, based on your geographic location and the time of year. This optimization will minimize the risk of shading and hot spots by ensuring that your panels are positioned to receive consistent sunlight.
4. Install Shade-Free Mounting Systems
Some solar panel mounting systems allow for optimal spacing between the panels and the roof, which can reduce the risk of shading. These systems can ensure that sunlight reaches all parts of the panel, even during the early morning or late afternoon hours when the sun is lower in the sky.
Additionally, if your installation involves multiple panels, ensure that they are spaced adequately to avoid creating shadowing between them. Proper spacing will also allow for better airflow, which can help keep the panels cool and reduce the likelihood of overheating.
5. Use Bypass Diodes
Bypass diodes are components built into solar panels that help mitigate the effects of shading. These diodes allow electricity to bypass shaded areas of the panel, preventing damage to the cells and reducing the risk of hot spots. When purchasing solar panels, look for models that include high-quality bypass diodes to help protect your system.
If you are unsure whether your panels are equipped with bypass diodes or need to replace them, consult with a professional installer who can assess your system and make any necessary upgrades.
6. Monitor Your System’s Performance
Regularly monitoring the performance of your solar system can help you quickly identify any issues, including the development of hot spots. Many modern solar systems come with monitoring tools that track energy production and alert you to any sudden drops in output. If you notice a decrease in energy production from one or more panels, it could be an indication of a hot spot or other issue that requires attention.
By keeping track of your system’s performance, you can spot problems early and address them before they lead to long-term damage.
Benefits of Protecting Against Hot Spots
Cost Savings: By reducing the likelihood of damage and improving your system’s efficiency, you’ll save money on repairs and energy bills in the long run.
Maximized Energy Efficiency: By preventing hot spots, you ensure that your panels are working at their peak efficiency, generating the most energy possible.
Prolonged Panel Lifespan: Addressing hot spots early reduces the risk of permanent damage to your panels, helping them last longer and protecting your investment.
7. Check Wiring and Connections
The wiring and connections within your solar panel system are critical to its overall performance and safety. Any issues with the wiring—such as corrosion, loose connections, or wear—can cause disruptions in energy flow, reduce the efficiency of your system, or even pose serious safety risks. Regularly checking and maintaining the wiring and connections ensures that your solar system operates smoothly, efficiently, and safely for years to come.
Why Wiring and Connections Matter
The wiring in your solar system carries the electrical current generated by the panels to the inverter, and from there to your home’s electrical grid. A fault in the wiring can cause energy loss, inefficient power transfer, or even the risk of electrical fires. Issues such as corroded wires, loose connectors, or damaged insulation can create electrical resistance, preventing the system from functioning at full capacity.
Moreover, improperly connected wires or poorly maintained electrical components can lead to safety hazards, including electrical shorts or fires. That’s why checking the wiring and connections is a crucial part of regular solar system maintenance.
Common Wiring Issues to Watch For
1. Corroded Wires
Corrosion is a common issue, especially in areas with high humidity, salt air, or fluctuating temperatures. Over time, the metal components of the wires—typically copper—can oxidize, leading to reduced electrical conductivity and potential power loss. Corroded wires can also cause heat buildup, which, if left unchecked, could lead to fire hazards.
Look for signs of corrosion, such as discoloration or a white, powdery residue on the wires or connectors. If corrosion is detected, the affected wires or connections will need to be cleaned or replaced by a professional.
2. Loose or Disconnected Wires
Loose connections in your solar system can disrupt the flow of electricity, leading to energy inefficiency and possible system failure. Over time, the vibrations from wind or the settling of your home or roof can cause connections to loosen. This can result in arcing, heat buildup, or even an electrical fire if left untreated.
It’s important to check the connections at all points of your solar system, including the junction box, inverter, and battery connections. If any wire is loose or disconnected, it should be re-secured immediately.
3. Damaged Insulation
The insulation around your wiring is there to protect it from environmental factors like moisture, UV exposure, and physical damage. However, it can wear out over time, especially in extreme weather conditions. Damaged insulation can expose the wires to the elements, potentially causing short circuits, energy loss, or fire hazards.
Inspect the wiring for any visible signs of wear, such as cracks, fraying, or discoloration. If the insulation appears damaged, it’s essential to replace or repair it promptly to prevent further issues.
4. Exposed Wires
Exposed wires are a serious safety concern, as they can lead to electrical shocks or short circuits. If any wires are not properly secured or protected by insulation, they should be addressed immediately. Exposed wires can be caused by improper installation or wear and tear over time.
During your inspection, ensure that all wiring is properly encased and protected. Any exposed wires should be re-insulated or replaced as necessary.
How to Check Your Wiring and Connections Safely
Inspecting the wiring in your solar system requires caution, as it involves electrical components that can pose risks if handled incorrectly. Follow these steps to perform a safe and effective inspection:
- Turn Off the System: Before inspecting any electrical components, make sure to turn off the solar system. This will prevent any risk of electric shock or short circuits during your inspection.
- Look for Visual Signs: Visually inspect all exposed wiring and connections for signs of damage, such as corrosion, discoloration, or physical wear. Check the cables, junction boxes, and connectors for any signs of moisture intrusion or wear.
- Tighten Loose Connections: If you find any loose connections, use the appropriate tools to securely tighten them. Be sure not to overtighten, as this can damage the connectors.
- Check for Proper Insulation: Examine the insulation around the wires for any cracks, tears, or signs of wear. If you notice any exposed wires, repair or replace the damaged insulation immediately.
- Use a Multimeter: If you have the necessary skills, you can use a multimeter to test the electrical continuity of your system and check for voltage irregularities. This can help you identify issues in the wiring or connections that may not be visible to the naked eye.
When to Call a Professional
While regular inspections of the wiring and connections are important, some tasks may require the expertise of a licensed electrician or certified solar technician. Here are situations when it’s best to call a professional:
- If You Find Corrosion or Significant Damage: If you find extensive corrosion, damaged wiring, or any other serious issues, it’s best to have a professional assess and repair the damage. They can ensure that the issue is handled safely and effectively.
- If You’re Not Comfortable Working with Electrical Systems: If you’re unsure how to inspect or repair the wiring safely, it’s always a good idea to hire a professional. Electrical systems can be dangerous if mishandled.
- For Regular Inspections: While you can perform basic inspections of your system, it’s recommended to schedule periodic professional inspections to ensure everything is functioning correctly and safely. A professional technician will have the tools and expertise to identify potential issues that may not be immediately obvious.
Benefits of Checking Wiring and Connections
Cost Savings: Maintaining the integrity of your system’s wiring can help avoid expensive repairs or replacements caused by neglecting wiring issues. It also ensures that your system operates at peak efficiency, reducing energy costs.
Improved Energy Efficiency: Properly maintained wiring ensures that electricity flows smoothly through your system, maximizing energy production and reducing the risk of energy loss.
Enhanced Safety: Regular checks and maintenance of the wiring and connections reduce the risk of electrical fires, shocks, and other hazards associated with faulty wiring.
Increased System Longevity: By addressing wiring issues early, you can prevent larger problems from developing, extending the lifespan of your solar system and reducing the need for costly repairs.
8. Install a Surge Protector
Electrical surges, whether caused by lightning strikes or fluctuations in the power grid, can pose a significant threat to the longevity and functionality of your solar energy system. These sudden spikes in voltage can damage sensitive components like solar inverters, batteries, and even the panels themselves. To protect your investment and ensure your solar system operates efficiently, installing a surge protector is a smart and necessary step.
What is a Surge Protector and How Does It Work?
A surge protector is a device designed to absorb and redirect excess voltage, preventing it from reaching your solar system’s components. When a voltage surge occurs, the surge protector diverts the excess energy away from your system, shielding your solar panels, inverter, and other electrical parts from potential damage.
Surge protectors are particularly important for systems that are vulnerable to lightning strikes or grid fluctuations, as they can cause significant spikes in electrical current. Without protection, these surges can fry the internal circuits of your inverter, damage the panels, or even cause complete system failure.
Why You Need a Surge Protector for Your Solar System
1. Protection Against Lightning Strikes
Lightning strikes are one of the most powerful causes of electrical surges. Even if a lightning strike doesn’t hit your solar panels directly, the nearby electrical energy can travel through power lines, increasing voltage levels that may damage your system. Solar inverters, which convert DC to AC power, are particularly vulnerable to lightning strikes due to their delicate electronic components. A surge protector acts as a barrier, absorbing the energy from the lightning strike and preventing it from reaching the inverter or other sensitive parts.
2. Guard Against Grid Fluctuations
The electricity grid can experience fluctuations in voltage due to various factors, such as power demand spikes, equipment malfunctions, or problems at the local utility. These fluctuations, sometimes called “brownouts” or “spikes,” can be less severe than lightning strikes but still pose a risk to your solar system. Surge protectors help by keeping these fluctuations within safe limits and preventing them from damaging your panels or inverter.
3. Extend the Lifespan of Your System
Surge protectors not only prevent immediate damage but also contribute to the long-term health of your system. By protecting your solar equipment from voltage spikes, surge protectors reduce wear and tear on your system’s components, helping them last longer. This can save you money on costly repairs or replacements, ensuring that your system continues to perform efficiently for years to come.
4. Prevent System Downtime
Electrical surges can cause your solar system to shut down or malfunction. In extreme cases, a surge can cause complete failure of the inverter, leaving you without power until the issue is fixed. Surge protectors can prevent these types of disruptions, ensuring that your system operates continuously, even during adverse weather conditions or grid issues.
Types of Surge Protectors for Solar Systems
When selecting a surge protector for your solar energy system, it’s important to choose one that is specifically designed for solar applications. Here are the main types of surge protectors you can consider:
1. AC Surge Protectors
AC surge protectors are installed on the AC side of your solar system, typically between the inverter and your home’s electrical panel. These protectors guard against voltage surges coming from the grid or local power lines, which could otherwise damage the inverter or other components connected to the AC system.
2. DC Surge Protectors
DC surge protectors are installed on the DC side of your system, between the solar panels and the inverter. They are designed to protect against surges originating from the solar array itself, such as electrical spikes caused by nearby lightning strikes. DC surge protectors are particularly important for solar systems located in areas with frequent lightning activity.
3. Whole-House Surge Protectors
In addition to individual AC and DC surge protectors, you can also install a whole-house surge protector. This device is connected to your electrical panel and provides protection for your entire home, including your solar system. While it offers broader protection, it’s still a good idea to pair it with AC and DC surge protectors specifically for your solar system.
How to Choose the Right Surge Protector for Your Solar System
When selecting a surge protector, consider the following factors to ensure you’re getting the right protection for your system:
- Voltage Rating: Ensure that the surge protector is rated for the voltage levels of your solar system. It should be able to handle the voltage generated by both the panels and the inverter without allowing excess energy to damage your system.
- Surge Capacity: The surge protector should have a high surge capacity to handle significant voltage spikes, such as those caused by lightning. Look for protectors with a high joule rating, which indicates their ability to absorb energy.
- Response Time: A surge protector’s response time is crucial in protecting your system. The faster it reacts to a surge, the better protected your system will be. Choose a surge protector with a quick response time to ensure immediate action during a voltage spike.
- Certified for Solar Use: Always choose a surge protector that is specifically designed for solar energy systems. It should meet safety standards and be compatible with your system’s components.
Installation and Maintenance
While it’s possible to install a surge protector yourself if you have experience with electrical systems, it’s generally recommended to hire a professional to ensure proper installation. A certified electrician or solar technician will ensure that the surge protector is correctly installed and integrated into your system for optimal protection.
Surge protectors are relatively low-maintenance, but it’s still a good idea to have them inspected periodically, particularly after severe weather events or lightning storms. An experienced technician can check the surge protector’s functionality and replace it if necessary to ensure continuous protection.
Benefits of Installing a Surge Protector
Cost Savings: By avoiding costly repairs or replacements due to power surges, a surge protector offers long-term savings and ensures you get the most out of your solar investment.
Prevents System Damage: Surge protectors prevent power spikes from damaging your solar panels, inverter, and other critical components.
Enhances Safety: Surge protectors reduce the risk of electrical fires and other safety hazards caused by overvoltage.
Improves System Efficiency: By protecting your system from surges, a surge protector ensures that your solar energy system continues to operate efficiently and reliably.
9. Understand Warranty Terms
A solar energy system is a significant investment, so it’s crucial to understand the warranty terms for your panels, inverters, and batteries. Warranties provide essential protection and peace of mind, ensuring that you’re covered in case something goes wrong. However, to fully benefit from your warranty, it’s important to know what’s included, what’s not, and the maintenance requirements to keep it valid.
Why Understanding Warranty Terms is Crucial
Solar panels and associated equipment like inverters and batteries are designed to last for many years, but over time, wear and tear can occur. Warranties are there to protect you from unexpected repairs or replacements, saving you from costly out-of-pocket expenses. However, many warranties come with specific terms and conditions that must be met to remain valid. Understanding these terms helps you avoid voiding the warranty inadvertently.
Key Elements of a Solar Warranty
Solar system warranties typically cover the following areas:
1. Panel Performance Warranty
Most solar panels come with a performance warranty, often lasting 20 to 25 years. This warranty guarantees that your panels will produce a certain percentage of their rated capacity, typically around 80-90% of their original output after 20 years. If your panels fall below this threshold due to defects or degradation beyond the normal rate, the manufacturer may offer to replace them or provide compensation.
2. Product Warranty
The product warranty covers defects in materials or workmanship. This warranty typically lasts between 10 to 12 years, depending on the manufacturer. If your panels malfunction due to manufacturing defects during this period, the manufacturer is responsible for repairing or replacing them at no cost to you.
3. Inverter Warranty
Inverters are a critical part of your solar system, converting the DC electricity from the panels into usable AC power. Inverter warranties generally last between 5 to 10 years, depending on the brand and model. Some companies offer extended warranties for inverters, covering additional years of protection. Inverters are more prone to failure over time due to constant wear and tear, so it’s essential to ensure that your inverter is covered.
4. Battery Warranty
For solar systems with battery storage, battery warranties are equally important. Depending on the battery type (lithium-ion, lead-acid, etc.), warranties typically range from 5 to 10 years. These warranties cover defects as well as performance degradation, which can reduce the battery’s ability to store energy over time. Be sure to understand the specific terms regarding battery capacity retention, as many warranties only cover a certain percentage of capacity after a specific time frame.
Common Exclusions in Solar Warranties
While warranties offer valuable protection, they also come with exclusions. These exclusions can vary between manufacturers and types of equipment, but some common ones include:
- Damage Caused by Improper Installation or Maintenance: If your panels, inverter, or battery are damaged due to improper installation or failure to follow the maintenance guidelines, the warranty may become void. Always hire certified professionals for installation and adhere to recommended maintenance practices.
- Acts of Nature: Many warranties do not cover damage caused by extreme weather events, such as hurricanes, tornadoes, or earthquakes. However, you may be able to protect your system with additional insurance that covers such events.
- Normal Wear and Tear: While your solar panels and batteries are designed to last for decades, warranties may not cover gradual degradation of efficiency over time. Panels typically lose about 0.5% of their efficiency each year, and this decrease is often not covered by the warranty.
- Cosmetic Damage: Many solar warranties do not cover cosmetic damage such as scratches or discoloration that do not affect the performance of the system.
- Unauthorized Modifications: Any changes or modifications made to your solar system by unauthorized technicians or DIY repairs may void the warranty.
How to Keep Your Warranty Valid
To ensure that your warranty remains valid throughout its term, there are several actions you can take:
1. Follow the Maintenance Guidelines
Manufacturers often include maintenance requirements as part of the warranty terms. These can include regular inspections, cleaning, and ensuring that the system is free from debris or obstructions. Failing to follow these guidelines can jeopardize the validity of your warranty. For example, cleaning panels with harsh chemicals or high-pressure water can damage their surface and void the warranty.
2. Use Authorized Installers
As mentioned, using certified installers is vital to maintaining your warranty. If the system is improperly installed, it could lead to malfunctions or failures that are not covered under the warranty. Always choose installers who are licensed and experienced with solar systems.
3. Keep Documentation
Maintain detailed records of your system’s installation, any maintenance performed, and any inspections conducted. This documentation may be required in the event of a warranty claim to prove that you’ve followed the necessary steps for proper care and upkeep.
4. Regular Inspections
While cleaning your panels is important, regular professional inspections are also crucial to ensuring that your solar system continues to function optimally and that all components are working as expected. This helps you spot potential issues early and prevents larger, more costly repairs later. Some manufacturers may even require inspections at specific intervals to keep the warranty valid.
5. Know the Warranty Process
If something goes wrong with your system, knowing how to file a warranty claim is important. Review the warranty terms carefully to understand the steps involved in submitting a claim, as well as the documentation required (e.g., proof of purchase, installation, maintenance records). The quicker you act, the more likely you are to resolve the issue efficiently.
10. Prepare for Extreme Weather
Extreme weather events, such as hailstorms, hurricanes, and heavy snow, can pose significant risks to your solar energy system. While solar panels are designed to be durable and withstand various environmental conditions, extreme weather can still cause damage to both the panels and the supporting infrastructure. If you live in an area prone to such conditions, taking proactive measures to prepare your system can help safeguard your investment and ensure its continued performance.
Why Preparing for Extreme Weather is Important
Solar panels are exposed to the elements 24/7, which means they are susceptible to damage from severe weather. Hail, heavy snow, high winds, and intense heat can all affect the structural integrity and functionality of your solar system. Without proper preparation, these extreme weather events could lead to expensive repairs or even the total failure of your system. Preparing for extreme weather not only prevents damage but also extends the lifespan of your system and ensures it continues to produce energy efficiently.
Protective Measures for Different Weather Conditions
1. Hail Protection
Hailstones, especially those that are large or fall at high speeds, can crack or shatter solar panels. While most solar panels are made with tough, tempered glass, they are not entirely immune to hail damage. To protect your solar panels from hail, consider the following options:
- Hail Guards: A hail guard is a protective mesh or screen that can be installed over your solar panels. It acts as a barrier, absorbing the impact of hailstones and preventing them from reaching the panels. These guards are made from strong, impact-resistant materials and are designed to withstand heavy hail. They are especially useful in areas where hailstorms are frequent and severe.
- Panel Mounting Height: Adjusting the height of your solar panels can help reduce the risk of hail damage. By positioning the panels slightly higher, you can create more clearance between the panels and any debris or hailstones that may fall. This is especially important for ground-mounted systems, where the panels are more exposed.
2. Hurricane and High Wind Protection
Hurricanes and high winds can cause significant damage to solar systems, particularly if they are not securely mounted. Solar panels can be lifted off their mounts by strong winds, or the system’s infrastructure can be damaged. To protect your system during hurricanes or high wind conditions:
- Reinforce Mounting Systems: Ensure that your solar panels are properly secured to their mounts. Use robust, weather-resistant materials such as stainless steel for mounting hardware. Wind-resistant mounts are available that provide additional stability for solar panels during extreme winds.
- Adjustable Mounts: If you live in an area prone to hurricanes or high winds, consider using adjustable panel mounts. These mounts allow you to change the angle of your panels, making them less susceptible to wind uplift. By tilting the panels at a lower angle, you reduce the wind resistance and minimize the risk of wind damage.
- Solar Panel Shading and Windbreaks: Planting trees or installing windbreaks around your solar system can reduce the force of high winds on the panels. However, make sure that the windbreaks do not cast shadows on your panels, as shading can reduce their efficiency.
3. Snow and Ice Protection
In colder climates, heavy snow accumulation can reduce the performance of your solar panels by blocking sunlight. Furthermore, the weight of snow can put additional strain on the mounting structure. To prevent snow-related damage:
- Snow Guards: Snow guards are devices that can be installed on the roof or the frame of your solar panels to prevent snow and ice buildup. These guards help the snow slide off gradually, reducing the risk of heavy snowfalls causing damage to the panels or the roof.
- Heating Systems for Panels: Some systems use heated cables or mats installed underneath the panels to melt snow and ice. These systems are especially useful in areas with frequent snow and ice accumulation. While they are an added expense, they can help keep your panels clear and ensure optimal energy production during the winter months.
- Regular Cleaning: After a snowfall, regularly remove any accumulated snow from your solar panels to ensure that they continue to receive maximum sunlight. Use a soft broom or a snow rake designed for solar panels to avoid damaging the glass surface. Never use metal tools or high-pressure water, as these can scratch or damage the panels.
4. Flooding and Water Damage
For homes in flood-prone areas, water damage can affect both the panels and the inverter. To protect your solar system from flooding:
- Elevated Mounting: If you live in a flood-prone area, consider installing your solar panels at a higher elevation. This can prevent the panels from being submerged during floods. Elevated mounting systems also help protect the wiring and other electrical components from water damage.
- Waterproofing Inverters: Ensure that your solar inverter is installed in a water-resistant or waterproof enclosure, especially if it is located near the ground. This will help protect it from water damage during heavy rains or flooding.
Additional Tips for Preparing Your Solar System for Extreme Weather
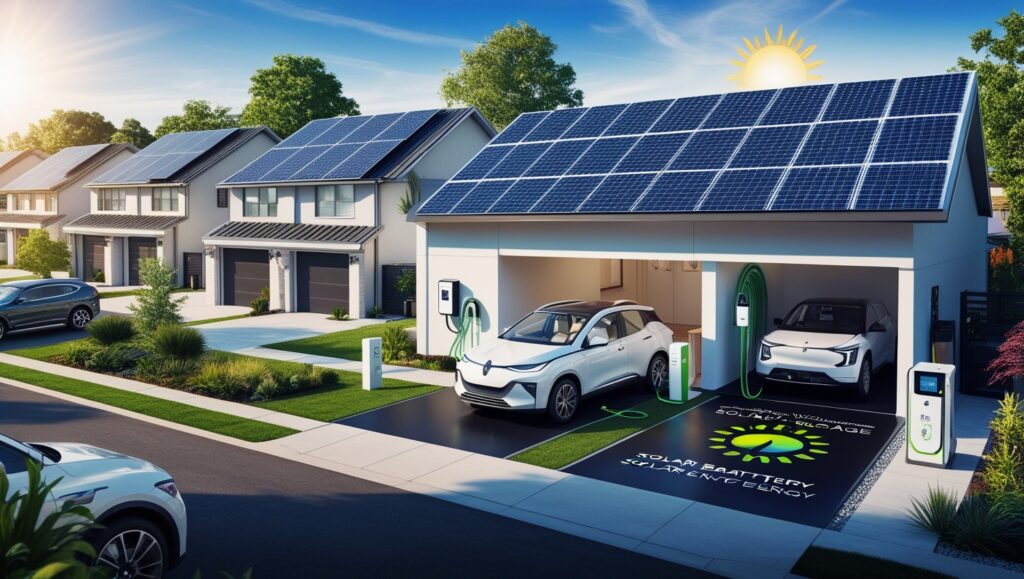
Emergency Backup Plans: If you live in an area prone to hurricanes, heavy snow, or other extreme weather events, consider having an emergency backup plan in place. This could include a battery storage system to ensure your home has power during outages or a plan for temporary panel disconnection if severe weather is expected.
Insurance: While warranties protect against manufacturing defects, they generally don’t cover weather-related damage. To safeguard your solar system, consider purchasing additional insurance that covers damage caused by extreme weather events. Some homeowners’ insurance policies may already cover solar panels, but you should confirm this with your insurer and make sure the coverage is adequate.
System Monitoring: Install a monitoring system to track the performance of your solar panels. Monitoring systems allow you to detect any issues early, such as damage from a storm or malfunctioning components, so that you can address the problem quickly.
Conclusion
Maintaining the efficiency and longevity of your solar panel system requires proactive care and attention. By choosing high-quality panels, ensuring professional installation, performing regular maintenance, and preparing for extreme weather, you can minimize the risk of common issues and maximize the performance of your solar energy system. Regular monitoring, protecting against hot spots, and understanding your warranty terms further safeguard your investment. With the right precautions, your solar system can continue to provide reliable, clean energy for many years to come. Taking these steps not only protects your system but also ensures that you get the most value from your solar investment, reducing the need for costly repairs and ensuring optimal performance year-round.


